How to Wire a New House: A Step-by-Step Guide
Wiring a new house is one of the most important and complex tasks in home construction. It ensures that the home will be equipped with a safe, reliable, and energy-efficient electrical system. Whether you’re working with a licensed electrician or taking on the project yourself, it’s crucial to follow proper guidelines to ensure everything is up to code. Here’s a step-by-step guide on how to wire a new house.
1. Plan the Electrical Layout
Before any wires are pulled, create a detailed electrical plan that outlines the locations of outlets, light switches, electrical panels, circuit breakers, and light fixtures. This plan should be in compliance with local building codes and should take into account the home’s layout, the number of electrical devices to be used, and any future expansion needs.
2. Install the Electrical Panel
The first step in the actual wiring process is to install the electrical panel (also known as the breaker box). This is where all the electrical circuits in the home will be connected and controlled. It should be installed in an accessible location and sized correctly to handle the home’s electrical load.
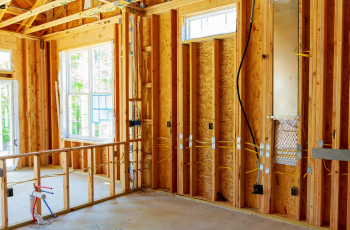
3. Run the Main Wiring
Once the panel is in place, begin running the main electrical wiring throughout the house. Typically, non-metallic sheathed cable (NM) is used for residential wiring. Start by running the cables from the main panel to each area of the house, ensuring you follow the layout specified in your plan.
4. Install Electrical Boxes
At each outlet, switch, and fixture location, install electrical boxes. These boxes will house the connections for outlets, switches, and light fixtures. The boxes should be secured to the wall studs to ensure a stable foundation for wiring.
5. Wire the Outlets and Switches
After placing the boxes, begin wiring the outlets and switches. For outlets, you’ll need to connect the hot wire (black), neutral wire (white), and ground wire (green or bare) to the appropriate terminals. Similarly, for switches, wire the circuit to control the flow of electricity to lights and other devices.
6. Wire the Light Fixtures
Next, wire the light fixtures. Depending on the design, you may have overhead lights, recessed lighting, or chandeliers. Make sure that the wiring is properly connected, with the hot, neutral, and ground wires securely attached to the light fixture’s terminals.
7. Install the Grounding System
Grounding is critical for electrical safety. Ensure that the entire wiring system is properly grounded. Install a grounding rod outside the house or connect to the local electrical grid’s grounding system, depending on local codes. All outlets and devices should be grounded for safety.
8. Connect the Circuit Breakers
Once the wiring is in place, connect the individual circuits to the circuit breakers in the electrical panel. Each circuit will correspond to a specific area of the house, such as lighting, outlets, or appliances. The breakers are designed to shut off the power in the event of an overload or short circuit.
9. Test the System
Before closing up the walls, test the wiring system to ensure that all outlets, switches, and light fixtures are functioning properly. Use a voltage tester to check each outlet for power and confirm that each circuit is working as intended.
10. Final Inspection
After completing the wiring, schedule an inspection by a licensed electrical inspector. This is required by most local building codes to ensure the wiring is safe, up to code, and installed correctly. Once the inspection is passed, you can proceed with closing the walls, installing drywall, and finishing the house.
Final Thoughts
Wiring a new house is a significant responsibility and should not be taken lightly. While some homeowners may choose to tackle the project themselves, it’s always best to hire a licensed electrician to ensure the work is done safely and according to local codes. Properly wiring a home ensures safety, efficiency, and functionality for years to come.